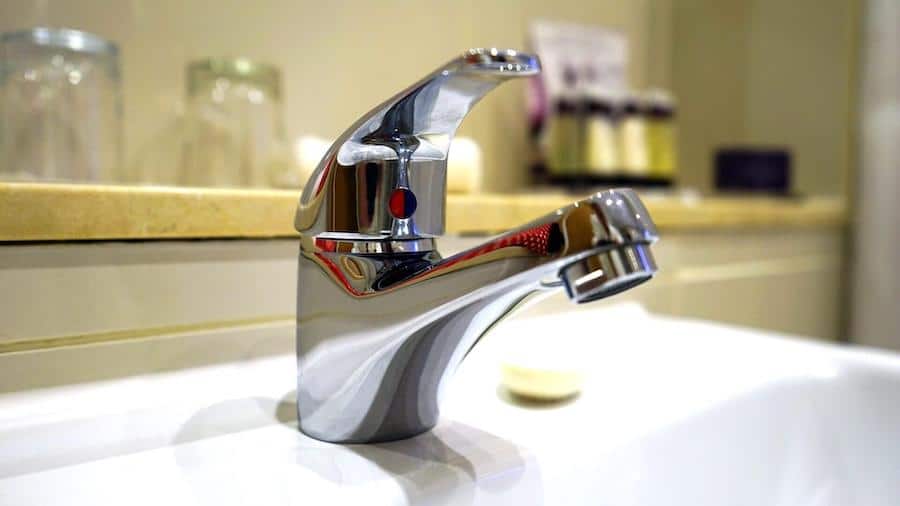
Home Bath products and appliances reviews Bathroom Faucets How to Fix a Leaky Bathroom Faucet? Useful guide and tips

How to Fix a Leaky Bathroom Faucet? Useful guide and tips

Last Updated: How to fix leaky bath faucetAccept it or not, bathroom faucets are getting trickier than ever now and their problems too especially their leakage issues. What could be done if your faucet starts leaking and wasting water? Should leaking water be left on the mercy of the faucet to be wasted all the way?

No way! You will not only be the culprit of water wastage but also see a huge rise in your bill. This is something that needs to be fixed, most importantly by getting which type of faucet you have installed. So, we start with how to fix a leaky bathroom faucet and also see how you can fix double handle leaky bathroom sink faucet.

Related posts

How to fix a leaky bathroom faucet?


If you are heading towards the bathroom with the tool kit to fix the leaky faucet, wait! Before fixing must know what type of faucet you are going to fix.

Determine the Faucet type

Most of the bathrooms have double handle sink faucets that are either slightly old models or the latest ones. You have to determine your faucet type:

  • Compression faucet – comparatively old with two separate handles for hot and cold water.
  • Cartridge bathroom faucet – modern cartridge faucet in which cartridge controls faucet’s water flow.
  • Ceramic disk faucet – have a ceramic cylinder to control cold and hot water.
  • Ball faucet – a ball is present in bathroom sink faucet.

How to fix a leaky double handle bathroom sink faucet?

How to fix compression faucet?

how to fix a compression faucet

  • Cut both water supply lines connecting to the faucet and loosen the screws with a wrench that is holding the handles of the faucet. Also, remove the shinning caps on the handle and carefully set aside.
  • When handles are removed you see there is a stem with O ring, gasket, and a washer. Unscrew this system and apply grease to the stem.
  • Install new screws, gasket, rubber seat washer, and all to the stem.
  • Fix the handles and knob back. Open the water supply after tightly screwing the nuts and check the leakage.

How to fix a cartridge bathroom sink faucet?

how to fix a cartridge faucet

  • Turn both water supply lines, hot and cold, off so that you can step in the cartridge faucet system.
  • Take the wrench from your tool kit and unscrew the faucet handles and remove knobs.
  • There must be a circular clip that is holding the cartridge at its place. take this clip out with the pliers.
  • Also, pull the cartridge out with the same plier and also cut the old O rings.
  • Grease your new ring before installation and place it in the system.
  • Now drop fully functional cartridge insert the clip you removed at the start and fix hales at the place with knobs.
  • Reconnect the water supply to the valves and test the faucet for leakage.

How to fix ceramic disk bath faucet?

how to fix a ceramic disc faucet

  • To fix the leakage of double handle ceramic disk faucet, you have to take the metal cap out from the inner system after closing all the pipes supplying water to the faucet and removing the handles.
  • Now unscrew the seals and pull the cylinder and see its condition. If it blocked you have a chance to clean it with soap on the brush but if it is unusable you need to change it to prevent any future leakage problem.
  • Add plumbers’ grease to the new cylinder and slide in the system.
  • Slide nut at its place and reattach the faucet’s handles with it.
  • Tourn the water supply on and check the faucet leakage.

How to fix a ball faucet?

how to fix a ball faucet

  • Like any other faucet, ball faucet is also easy to fix but the difference is you need to buy its tool kit for its special tools and set up. So prepared if you have a ball faucet, you are expected to replace its parts.
  • Now cut the water supply lines off to stop water and separate the handles from the faucet and set aside.
  • First, remove the cap and collar with the tools and then the ball and washer. This ball is controlling the water and stops to flow. If it is damaged water will keep releasing and ultimately cause leakage.
  • Now remove the seals and springs inside the faucet system with pliers and take out O-rings. Coat new rings in plumbers’ grease before inserting in the system.
  • Install all the washers and springs present in the kit and insert ball and cap.
  • Reassemble in the same way you disassembled and connect the water supplies.
  • Turn them on and see the result. If there is no water after closing the faucet it means you have achieved a milestone and ready to use a leakage-free faucet.

Subscribe
Notify of
0 Comments
Inline Feedbacks
View all comments