Steps to Install Drop-in Kitchen Sink
Drop-in kitchen sink is also referred to as a self-rimming sink. There is a rim that rests on the countertop, which supports the weight of the sink. Installation of drop-in sink is relatively easy and straight forward.
Drop-in is mostly made from heavy materials because the sink is equally supported around its entire perimeter with a composite material or cast iron. We can also have lightweight drop-in sinks from stainless steel.
Step 1: Selection of the Sink
 For you to replace the kitchen sink, select a new sink (take a look at our best kitchen sinks 2020 reviews and buying guide) that will fit the previous cutout in the countertop. This is very important so that it will look perfect.
To select a sink that fits the existing countertop, remove the old sink and carefully measure the dimensions with the measuring tape. You can also measure the countertop cutout.
For you to install a new sink for the first time in a countertop, measure the width of the countertop, and select a sink that will fit the countertop well.
Give close attention to other facilities in the cabinet that may come along the way. If you intend to install the faucet on the countertop, keep extra space that is sufficient for the faucet.
Step 2: Use Measuring Tape To Measure And Mark The Cutout
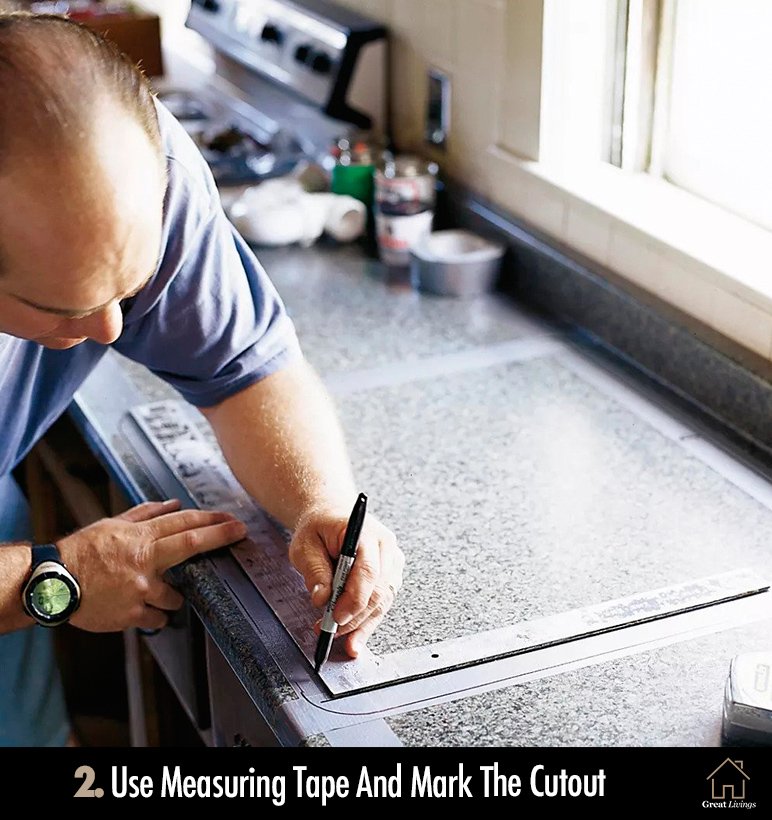 For installation of a new sink in a new countertop, mark a space that will give you a hole on the countertop. Draw the framework of the sink on the countertop using a measuring tape, ruler and felt tip marker or pencil.
We have different ways of properly cutting the dimension. You can choose one from the following:
Step 3: Cut The Sink Opening Out
 Use an angle grinder to cut the stone or stainless steel appropriately. For tiles, use a diamond blade saw while a jigsaw can be used for other materials.
If you are cutting with a jigsaw, drill a hole on the line of the cutout with a 3/8-inch drill bit to permit the jigsaw blade to poke through. Take time to carefully cut the marked outline on the countertop to avoid damage.
Step 4: Install the Faucet and Drain Assembly
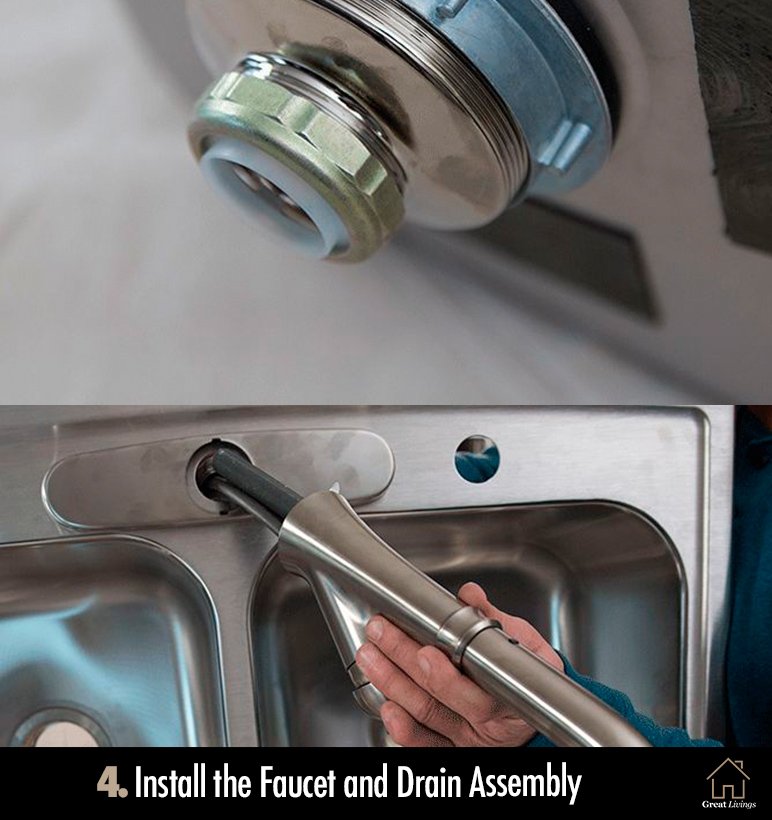 Install the drain assembly before you lower the sink into the countertop opening. Use a pair of sawhorses to set the sink on support. This will allow the drain hole to hang freely.
How to install the drain assembly
It is advisable to install the faucet onto the sink before lowering the sink in the countertop opening. Use the manufacturer’s manual to install it. It is very simple to do it.
Step 5: Set The Supports And The Sink Clips
Use the manufacturer’s manual for your specific sink instructions. The kitchen sink installation using sink clips is mostly for lightweight sinks like stainless steel or copper. Solid-surface sinks and heavy cast iron do not require clips.
Step 6: Position The Sink At A Place And Secure It
 The following steps are used to secure the sink at a place when you are learning how to install a kitchen sink.
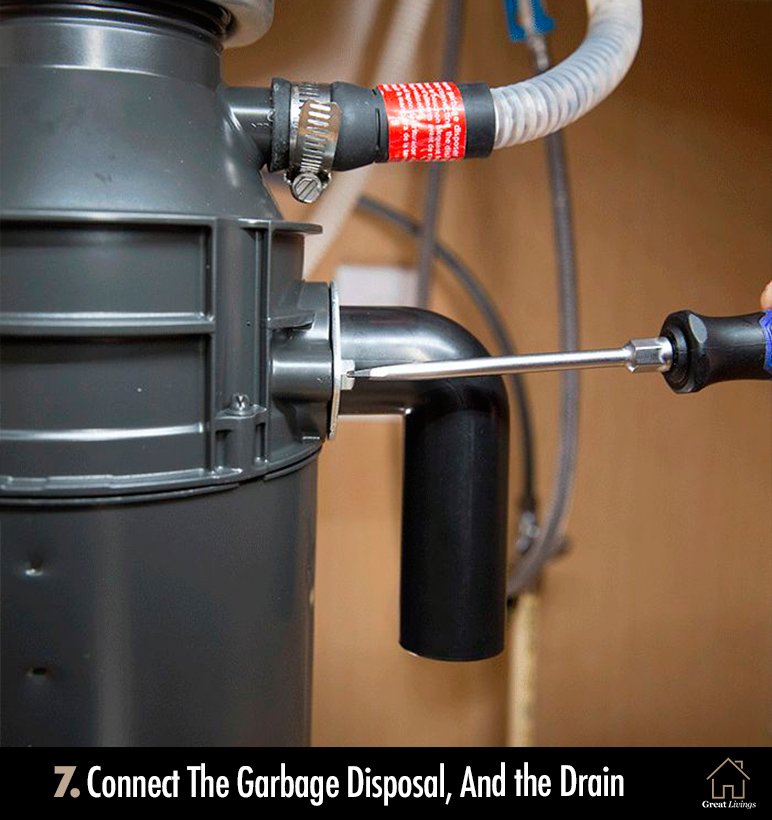
Step 7: Connect The Garbage Disposal, Dishwasher, And the Drain
 Flexible supply tubes are suitable for connecting the faucet tailpieces to the shut-off valve. Some manufacturers attach supply tubes while others do not. Use the tube to connect the faucet.
Install the garbage disposal by slipping the garbage disposal into the coupler that you earlier installed on the sink drain opening. Give the garbage disposal a quarter turn to lock it in place.
Connect the assembly to a common trap. Ensure that the shelving inside the cabinet is constructed to accommodate the bend of the assembly, which are several inches below the garbage disposal.

 Did you know that you can install a kitchen sink or replace a kitchen sink without calling an expert to your house? Yeah, you can do it by following simple steps.
 – Reviews & Buying Guide")
 Before I start showing you the steps that you should take to install a kitchen sink, take note of the following tools for your kitchen sink installation.